Crafts

2014.04.07

製作中ビデオを上手に作る10のコツ

Text by kanai

volume-38-ten-tips-for-video

この記事はMAKE英語版 Volume 38 62–63ページに掲載されたものです。

ビデオ製作を行う人々には、機材に凝る人が多い。しかし、いい機材を持つことは大切だが、それがすべてではない。まずは、携帯電話でも、古いコンパクトデジカメでも、昔のビデオカメラでも、ウェブカメラでも、今あるカメラで撮影を始めてみることだ。そして、どんな機材が自分に必要なのかを見極めてから、機材にお金を使おう。

My go-to gear.

現在、私が頼りにしている機材たちだ。Nikon D5100に35mmとマクロのレンズ、Sennheiser SK 100 G3無線ボディーパック・トランスミッター、そしてEK 100 G3無線オーディオ受信モジュールだ。また、Manfrotto Magic ArmSuper Clampも作業台の上で使っている。編集用ソフトは Final Cut Pro 7 だ。

実行を決意したなら、必要なものを慎重に考えよう。プロジェクトのサイズや製作過程には大きな幅があるだろうか。もしそうなら、デジタル一眼のようにレンズが交換できるカメラがいいだろう。MAKEのビデオを製作していたころは、私はOlympus E-P2を愛用していた。最初のコンパクト型フォーサーズシステムのカメラで、音声入力があった。その前はSanyo Xacti VPC-HD2を使っていた。このごろでは、Nikon D5100と35ミリレンズとマクロレンズの組み合わせをメインに使っている。可動式のディスプレイが付いているので、カメラを頭の上にセットし、ディスプレイを下に向けることで、ものを作りながら撮影ができる。外部マイクを接続して録音したい場合は、音声入力付きのカメラを探そう。

カメラは、普段から定期的に使うことを考えなければならない。撮影はいつも決まった場所で行うだろうか。もしそうでなければ、持ち運びに便利なカメラがいい。操作が簡単で、すぐに使えることも大切だ。できれば、店に行ってできるだけ多くの種類を実際に試してみることだ。非常に小さなことだが見落としやすく、泣きたいほど後悔する機能がある。三脚に固定したままバッテリーが交換できるかどうかだ。ネットで買うときは、なるべく多くの製品情報を見ておこう。また、返品が可能かどうかも確かめておくこと。

製作中ビデオを上手に作る10のコツ

Shoot near a window (but out of direct sunlight) during daylight hours. Fill from the complementary angle with a daylight- balanced softbox or clip lights diffused with tracing paper. If you’re a night owl, you’ll need a lot more lights. My Westcott Spiderlite fixture softbox has six compact fluorescent bulbs.

1) 照明はカメラよりも大切

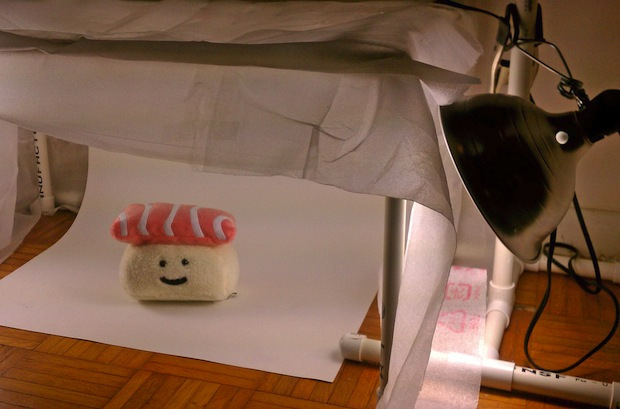
昼間は窓の近くで撮影しよう(ただし直射日光は避ける)。日光でホワイトバランスをとったソフトボックスや、トレーシングペーパーで光を拡散させたクリップライトで影の部分を補正する。夜型の人は、もっと照明が必要になる。

私が照明の補正に使っているソフトボックスはWestcott Spiderliteだ。6本の蛍光灯が入っている。

A cheap tripod is better than no tripod; for years I used a $15 Sunpak with no complaints. Some fancier models cantilever over your bench, or if your bench is sturdy you can use a clamp-on articulated arm, like my Manfrotto Magic Arm and Super Clamp.

2) 三脚を使おう

どんな安物でも、三脚がないよりはずっとマシだ。私はSunpakの15ドルの三脚を長年使っていたが、まったく不満はなかった。高級なタイプには、作業台を真上から撮れるカンチレバーが付いているものもある。作業台がしっかりしていれば、多関節アームをクランプで固定して使うこともできる。私はManfrotto Magic ArmSuper Clampを組み合わせて使っている。

Get comfortable working while capturing video of your projects’ assembly. Documenting your project shouldn’t be a chore, or it won’t happen often enough. It’s better to have too much footage than too little, and the more time you spend working in front of the camera, the more relaxed and natural your movements will be. I’m so used to working with my Magic Arm clamped in front of me that it feels weird to make stuff without it. Record key moments of your project’s construction. If there are repeated tasks, record the third or fourth repetition so you’ve had some practice before doing it for an audience. You are the cinematographer, so make your project look like it’s coming together beautifully.

3) 常に作りながら撮る

プロジェクトを作りながら撮影することに慣れよう。プロジェクトの記録を面倒がってはいけない。また、ほんの少ししか撮影しないというのもいけない。多すぎるぐらいに撮影しておくのがよい。カメラの前で作業する時間を長くすればするほど、作業もリラックスして行えて、自然な動きが撮影できるようになる。私は、目の前にMagic Armが固定されている状態で作業することに慣れてしまったので、むしろそれがない場所でものを作ると変な感じがする。

プロジェクトの要所はかならず撮影する。繰り返しの作業の場合は、3回目か4回目を撮るといいだろう。そのほうが作業に慣れた手つきを見せることができる。あなたは映画監督なので、プロジェクトがより美しく見えるように心がけながら作業することも大切だ。

Clutter distracts viewers from the important details, so put away anything that’s not  necessary for the shoot.

4) 作業台はいつもきれいに

作業台が散らかっていると、見る人の視点が細かい重要な部分に集中できなくなる。だから、関係のないものは片付けておこう。

Describe your project as if speaking to a  knowledgeable friend. Write down everything you want to include, then prioritize and edit hard. Leave only the most important bits, and save the rest for the description or blog post. Show  and/or tell the viewer what the video is about within the first 15 seconds. Read through your entire script at a natural pace. Under 5 minutes?  Fabulous. Under 90 seconds? Even better.

5) 台本を作ろう

知識のある友人に話すように、プロジェクトの内容を解説する。まずはビデオに入れたいものすべてを入れてから、優先順位を決めて大胆に編集していく。本当に大切なものだけを残して、入れられなかったものは、解説書やブログにまわす。最初の15秒で、このビデオが何を伝えるものであるかを話しておこう。普通の速さで台本を読み返してみる。5分以内であれば上出来。90秒以内ならなおよし。

Ask a friend to record some video of you talking about your project. What you’re looking at while recording video has a huge effect on how you look, sound, and generally come across to your viewers. Not only will a camera operator save you time by making sure your shot is framed and in focus, but reminds you that you’re speaking to real people when you talk at the lens. Set your camera up on the tripod and familiarize your friend with its basic operations such as focus, start/stop recording, and anything you want to make sure is/isn’t in the frame. Thank your friend before, during, and after your video shoot.   Then, get close to your project. You can show and tell at the same time, demonstrating key features of your project while describing them verbally. Look directly into the lens, not at the screen. Ask your friend to look through the viewfinder and not make eye contact while shooting. It’s OK to look at your project, but always come back to the camera lens to maintain an engaging connection with the viewer.

6) カメラに向かって話そう

友だちに手伝ってもらって、あなたがプロジェクトについて語る場面を撮ってもらおう。撮影中どこを見ているかが、あなたの姿や声や全体的な印象に大きな影響を与える。人に撮影してもらえば、きちんとした構図で撮影でピントもきれいに合って、自分ひとりで撮るときより手間が省けてよい、というだけでなく、レンズを通して本物の人間に語りかけているのだという意識を持つことができる。カメラの三脚にセットしたら、友だちに、ピントや録画の開始と停止といった基本的な操作に慣れてもらい、何を撮って、何を撮りたくないかをきっちり伝える。撮影前、撮影中、撮影後の折あるごとに友だちに「ありがとう」と感謝を伝えよう。

それから、プロジェクトを映す。同時にプロジェクトの説明を行いながら、目玉となる機能のデモを行う。

目線はディスプレイではなくレンズに真っ直ぐ向けること。友だちにも、撮影中はファインダーを覗いてもらって、互いにアイコンタクトが取れるようにしておくとよい。プロジェクトのほうへ目を向けてもよいが、かならずレンズに視線を戻して、見ている人とのつながりを保つようにすることが大切だ。

Find a comfortable and quiet place to record. A closet full of clothes makes a great sound-dampening mini-studio; even an iPhone in a parked car can record very clean sound. Drink plenty of water, sit up straight, smile like a complete buffoon, and project from your diaphragm. Keep smiling as you record — it makes the resulting audio much brighter and more engaging. I use a Zoom H4N audio recorder with a foam windscreen. You can make your own pop filter (to catch your hard consonant sounds like T and P) from a coat hanger or embroidery hoop and a pair of nylon stockings

7) 音声を別録りする

録音に適した、居心地のいい静かな場所を探そう。服がたくさん吊してあるクローゼットの中は、ちょうどいい防音スタジオになる。停めてある車の中でiPhoneに録音するだけでも、かなりよい音声で録れる。たっぷり水を飲んで、姿勢を正して、道化師になった気持ちで思いっきり笑顔を作り、腹の底から声を出す。録音中は笑顔を保つこと。明るくて魅力的な声で録れる。

私はZoom H4Nオーディオレコーダーにスポンジのウィンドスクリーンを付けて使っている。針金ハンガーか刺繍用の枠とストッキングでポップフィルターを自作してもよいだろう(破裂音を柔らかくすることができる)。

Have fun editing your gorgeous footage!  Get the video editing software that’s easiest for you to learn and use. I’ve heard nice things about iMovie, Final Cut Pro X, and Adobe Premiere. For now I’m still holding on to Final Cut Pro 7. Go through your script and arrange the best takes of each line on your timeline, and sprinkle liberally with b-roll. Show some “hero shots” early on to entice your viewer to keep watching.  Watch your video over and over; adjusting pacing, clip start/end points, audio levels, and color where applicable. Add music if you wish, such as Kevin MacLeod’s extensive library of royalty-free tracks.

8) しつこいぐらいに編集する

素晴らしい作品を作るための編集を楽しもう!

自分が使いやすいと感じたビデオ編集ソフトを手に入れる。iMovie、Final Cut Pro X、Adobe Premiereは評判がいいようだ。私は今のところ、Final Cut Pro 7を愛用している。

台本を見ながら、各ラインに最高のテイクを割り当てたら、その間をBロールで埋めていく。最高の中でも最高のテイクは、なるべく早い時期に使って、見る人の興味を引きつけるようにする。

何度も見て、速さや、シーンの開始点と終点、音声レベル、色を調整する。

音楽を入れてもよい。Kevin MacLeodの著作権フリーの音楽ライブラリーなどが便利だ。

If you enjoy editing as much as I do, you may want to set a timer while working and keep yourself on schedule, since perfecting your masterpiece timeline can be habit-forming. But it’s really better for your stamina and your viewer to push out multiple videos than to linger on any one for too long. Once your work is finished (or at least "abandoned," as they say) put it up on one or more of your favorite video sharing sites like YouTube and Vimeo. Don’t slack off when it comes to title, tags, and descriptions. Share it with your followers on Twitter, Facebook, Google+, and Tumblr. Email it to your friends, then share it with topical forums and blogs. Look for submission forms or “tips@” email addresses to the editors. Write a polite and brief description of your project/video, paste the link, and suggest that his/her readers might like it. Check out the YouTube playbook for more tips on engaging and growing your online video audience.

9) 容赦なく見せつける

私と同じぐらい編集が楽しめるようになると、作業時間を管理するためのタイマーをセットしたくなるはず。完璧な作品にしようと編集に凝り出すと、止まらなくなるからだ。しかし、自分自身と見る人の体力を考えても、長い作品1本よりも、何本かの短い作品に分けるほうがよい。

編集が完成したら(というか、あきらめが付いたら)、YouTubeやVimeoなどのビデオ共有サイトにアップロードする。タイトルやタグや説明のところで力を抜いてはいけない。Twitter、Facebook、Google+、Tumblrを使ってフォロワーに宣伝し、友だちにはメールで知らせる。そして、テーマの合うフォーラムやブログにも書き込む。雑誌などの編集者にもメールなどで売り込みをかけよう。丁寧で簡潔な文面でプロジェクトとビデオについて紹介し、リンクを貼り、読者が喜ぶに違いないと売り込む。ビデオの再生回数を増やすためには、YouTube playbookなどの情報を参考にしよう。

Your videos, if you make them often enough, will improve over time. And remember: When in doubt, add footage of the project with a cat — everybody likes cat videos!

10) 自信が持てないときはネコを出す

ビデオの出来、不出来は、時間がたつとわかってくる。どうしても自信が持てないときは、プロジェクトとネコのシーンを加えることだ。ネコのビデオはみんな大好きだから。

– Becky Stern

原文